Home Assistant allows tweaking the default theme directly from the web interface. For example, you can set it to use light or dark mode or have it set up to change automatically based on your system preferences. You can also change the primary color and the accent color to whatever you want. However, with the help of custom themes, you can tweak more things and make the web interface look the way you want. Like adding a custom background to the dashboard, making the corners on the cards rounded, changing the card’s drop shadow, and much more. In this article, I will show you the ways you can set up custom themes in Home Assistant . I’m also going to share a few of my themes so you can use them in your Home Assistant instance.
Table of Contents
Enable custom theme in Home Assistant
To use custom themes in Home Assistant, you need to add 2 things to the configuration.yaml file. You can access the configuration files directly from the Home Assistant web interface by using the VS Code add-on
or the File Editor add-on
. When you access the config files, open the configuration.yaml file, and anywhere on the file, enter the following:
frontend:
  themes: !include_dir_merge_named themes
Save the file, and then you need to create a folder named themes in the config folder. This would be the folder where all custom themes will be saved. Next, restart Home Assistant to apply the changes.
Manually set up themes
One way to install a theme is by adding the file to the themes folder. For example, the iOS Dark Mode Theme
available on GitHub, you can open the themes folder and copy the file’s name. Then, in the Home Assistant config folder, create a new file in the themes folder and paste the name for the theme, including the .yaml extension at the end. Then, go back to the theme you want to install, open the file and copy the content. Go back to Home Assistant and paste the content into the file you just created. Save the changes and restart Home Assistant.
After Home Assistant is back online, to set the new theme, go to the Profile tab, and under Theme, click on the dropdown and select the new theme. If you go to the Overview tab, you can see the tweaks made to the web interface.

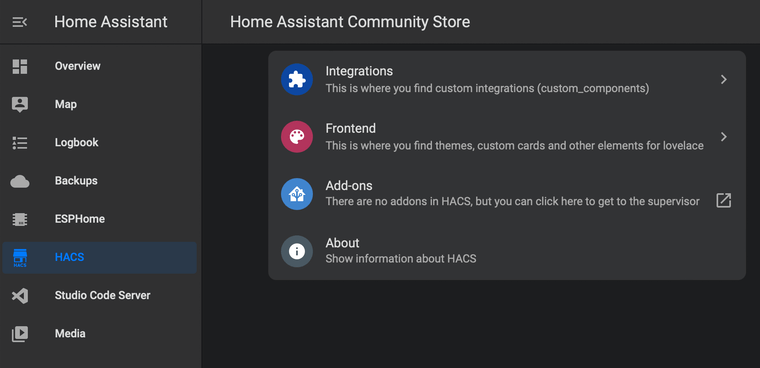
Download themes using HACS
The easiest way to install themes is via the HACS (Home Assistant community store). If you are not familiar with it, HACS provides a web interface in Home Assistant to quickly discover and install custom elements like custom cards, themes, and custom integrations. If you don’t have it installed yet, I do have a tutorial that shows you how to set it up. You can find it here .
So, to install a theme, go to HACS, click on Frontend and then click on Explore & download repositories. Uncheck the Lovelace option to browse the available themes in HACS. Then select the one that you would like to install. For example, the iOS Light Mode theme which is the light version for the theme that we manually set up before. Open it and then click on Download this repository with HACS. In the pop up that comes up, click on Download. After the theme downloads, go to the Profile tab and select the new theme under the Theme’s dropdown.
Add theme repository to HACS
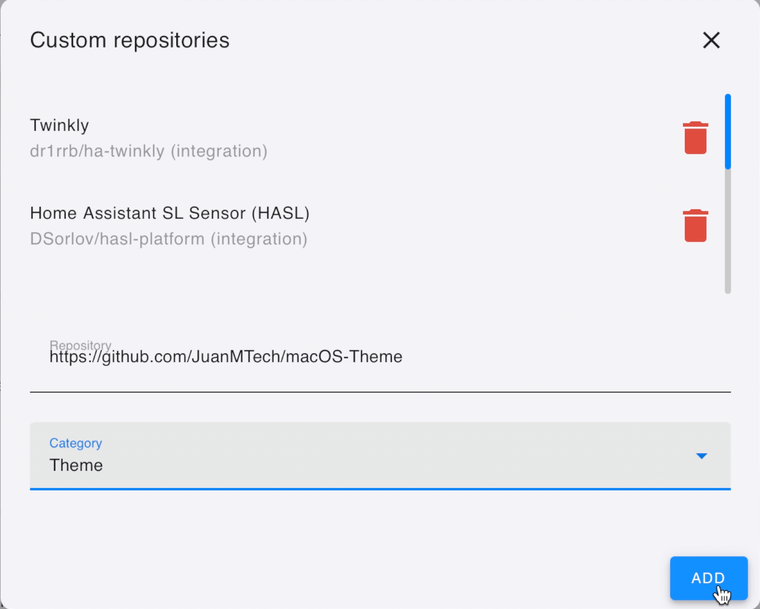
If there is a theme that you would like to download, but it’s not available via HACS, you can add the theme’s repository to HACS and easily download it to your Home Assistant.
To do this, copy the URL of the theme’s GitHub repository. Then, in HACS, go to Frontend. Click on the icon with the 3 dots at the top right and click on Custom repositories. Paste the URL for the theme under, Repository. Then under Category, select theme. Click on Add, and the theme will now show as a new repository. Open it and click on Download this repository with HACS. Leave it set to the latest version and then click on Download again. That’s it; if you go to the Profile tab, you can see the new theme added in the Theme’s dropdown.
Set a custom theme as default for all devices
When you change the theme on one device, it doesn’t set the theme to be the default for any device that you access Home Assistant. You would actually need to run a specific command to set it up to be the default theme. To do this, go to Developer Tools, Services, search for Set theme and select the service frontend.set_theme. Under Theme, select the theme you would like to set up as default. Then, enable Mode and choose either light or dark. Lastly, click on Call Service and repeat the process for the other mode.
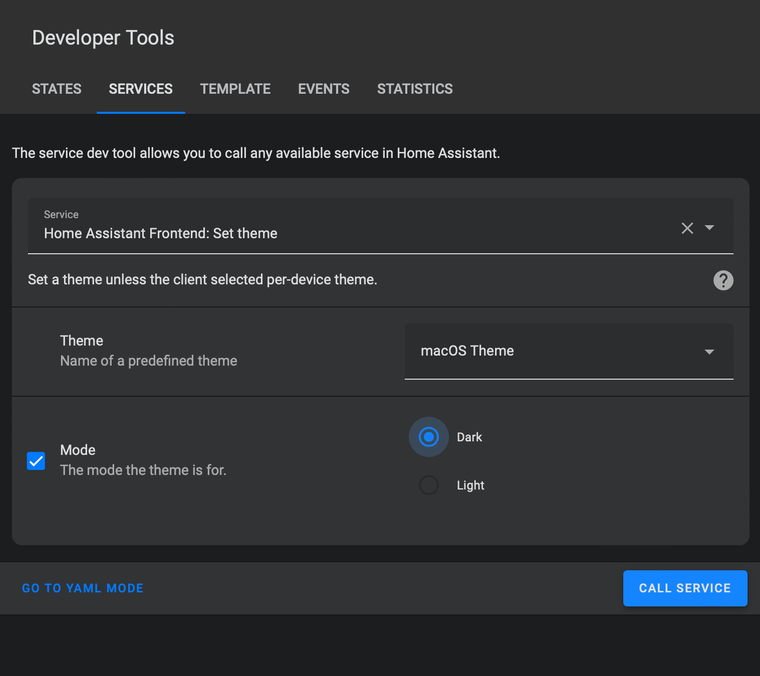
If you are setting up a theme that supports both light and dark mode, like the macOS Theme , leave the theme selected and just change the mode when you call the service.
The last thing you need to do is go to the Profile tab on all your devices and set the theme to Backend-selected. Now, when you access Home assistant on any device, it will display the new custom theme that you set up as the default.
There are some very nice themes available in HACS that you can browser and install in your Home Assistant. You can also find my themes in HACS by just searching for JuanMTech. Some of the themes that I’ve made are, for example, the iOS theme, which is based on the iOS system-wide light and dark mode. Another one is the Google theme, based on the Android light and dark mode theme. My latest one is the macOS theme based on the macOS system-wide light and dark mode. However, at the time of this tutorial, the macOS theme is not yet added to HACS, but you can add the repo the way I showed before. You can find the link to my GitHub page here .
Support
As a solo creator, I dedicate my free time to maintaining this site. If you find my content useful, consider supporting the blog—every contribution helps keep the content coming.
Buy me a coffee