NFC Tags have been around for a while now. They are inexpensive and can be used in many ways. You can use them to control smart home devices or even run automations directly on a smartphone. This article will show you how to integrate NFC Tags with Home Assistant . I will also show you how you can use them with your automations, and lastly, I’ll go over some of the NFC Tags you can purchase.
Table of Contents
So, what is NFC?
NFC, or Near Field Communication, uses radio waves for communication. NFC Tags don’t have a power source. It actually draws power from the device that reads them. An NFC reader, for example, a smartphone, creates a magnetic field that induces an electric current. So, when the device is closed enough to an NFC tag, it powers the tag allowing the data stored to be wirelessly transferred.
Which NFC Tags to buy?
There are many NFC Tags available from different brands that you can purchase, and they are also very cheap. Some of my favorites are, for example, the Thonsen round PVC NFC Tags , which you can get a pack of 25 for $15 on Amazon. They don’t have adhesive. However, Thonsen also has NFC stickers available, and you can get a pack of 30 for $16.
Now, these 2 types of NFC Tags don’t work on metal surfaces. The metal grounds the tags affecting the antenna, so it can’t create the current needed to power the chip. Some NFC Tags that do work on metal but they cost a little more. They have a ferrite foil which creates a barrier allowing the tag’s antenna to function correctly. The on-metal NFC Tags that I recommend are the Crystal Cube NFC Tags from Utopiaplus. They come in a pack of 9 and cost like $20. They are pricey, but they have a nice design and work very well. An alternative would be from Thomsen . They have a pack of 10 for $15.
Integrate NFC Tags with Home Assistant
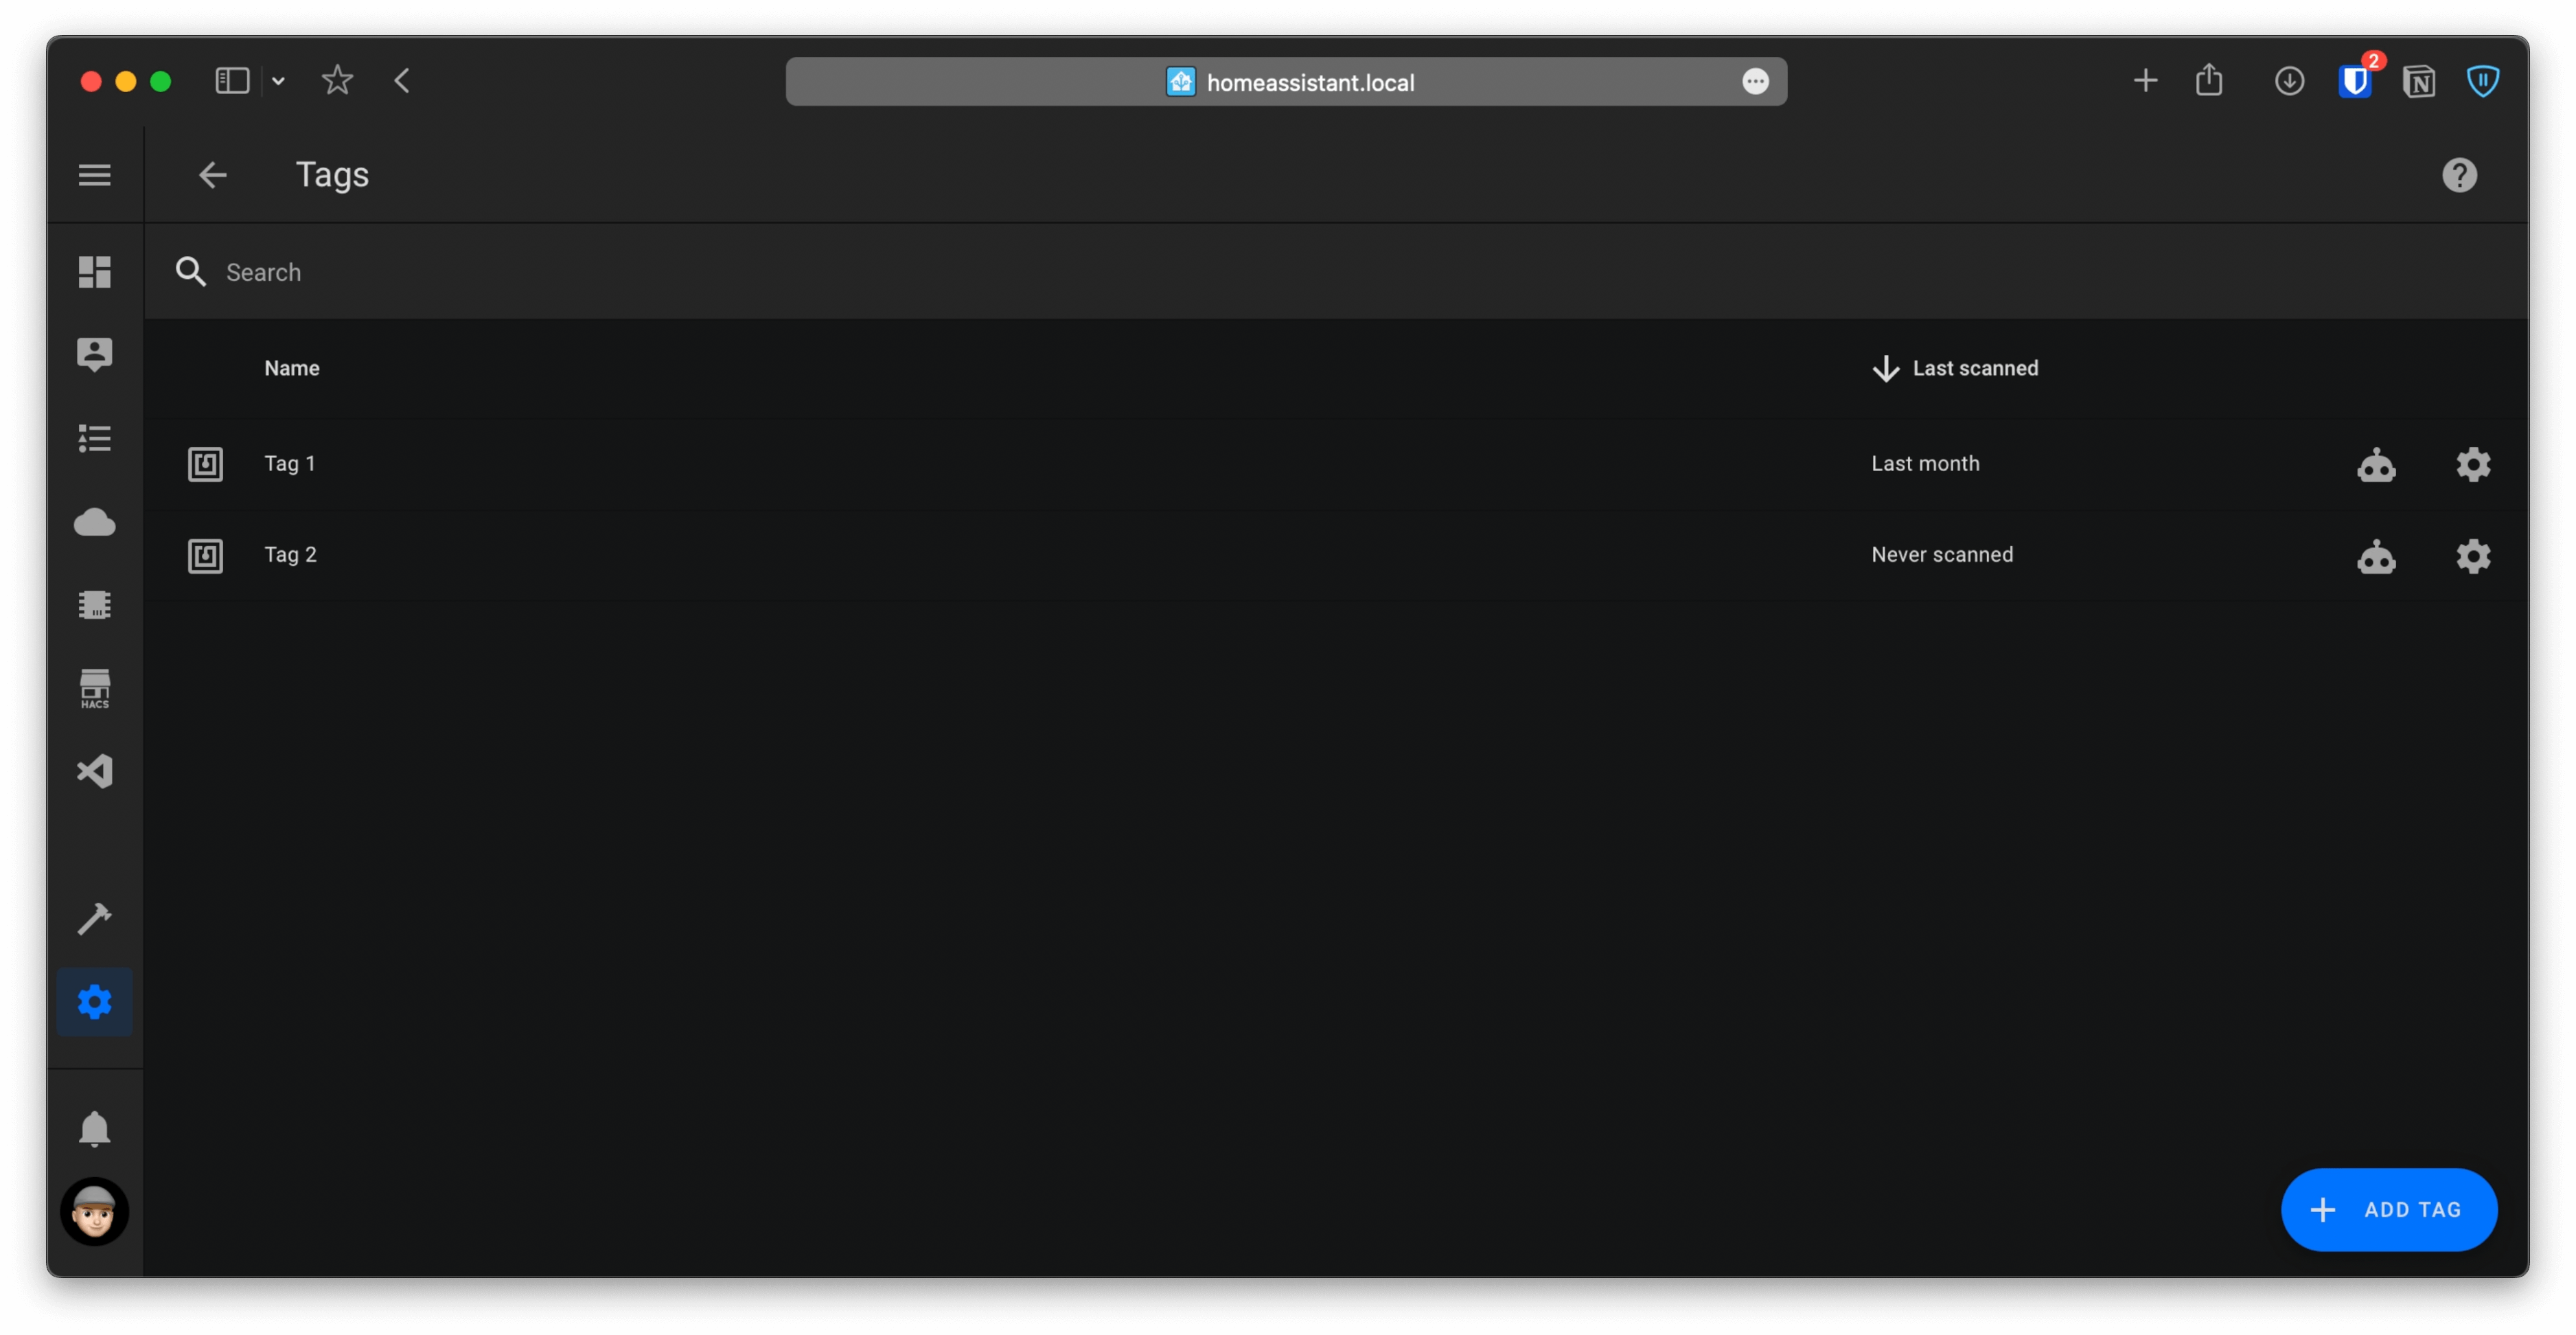
To set up an NFC tag with Home Assistant, open the Home Assistant app on a smartphone. Tap on the icon with the 3 lines on the top left to open the sidebar. Then, go to Settings, Tags, and tap on Add Tag. Set up a name for the new tag and the Tag ID field, leave it empty. Home Assistant will automatically generate the ID for you. Lastly, tap on Create and Write, and a pop-up will come up, prompting you to scan the NFC Tag.
After the tag is available in the tag’s panel, you will have a shortcut to create an automation with the tag. There is also an edit button where you can edit the tag’s name, view the tag’s ID number, and also an option to delete the tag. There is also the option to rescan the NFC Tag; however, you would only see that option when using the Home Assistant app on a mobile device.
Use NFC Tags with Home Assistant automations
Now that the NFC Tag is added to Home Assistant, you can use it in automations to control your smart home devices. It would pretty much work as a switch, but with the benefit that you don’t have to worry about batteries or if you put them outside, you won’t have to worry about water damage, for example.
Besides going to the automations page to create the automation, you can also click on the shortcut next to the NFC Tag in the Tags panel. We will create an automation to toggle some lights with an NFC Tag for this example.
In the Automation editor, set up a name for the new automation. Under Triggers, set the Trigger type to Tag, and below set the tag you would like to use.
After that, under Actions, set the Action type to Call service, and for the service, select light.toggle. Then, under Targets, click on Choose entity and select the light to control. Save the automation, and if you bring the phone over the NFC Tag, a notification pops up where you’ll need to tap to run the automation.
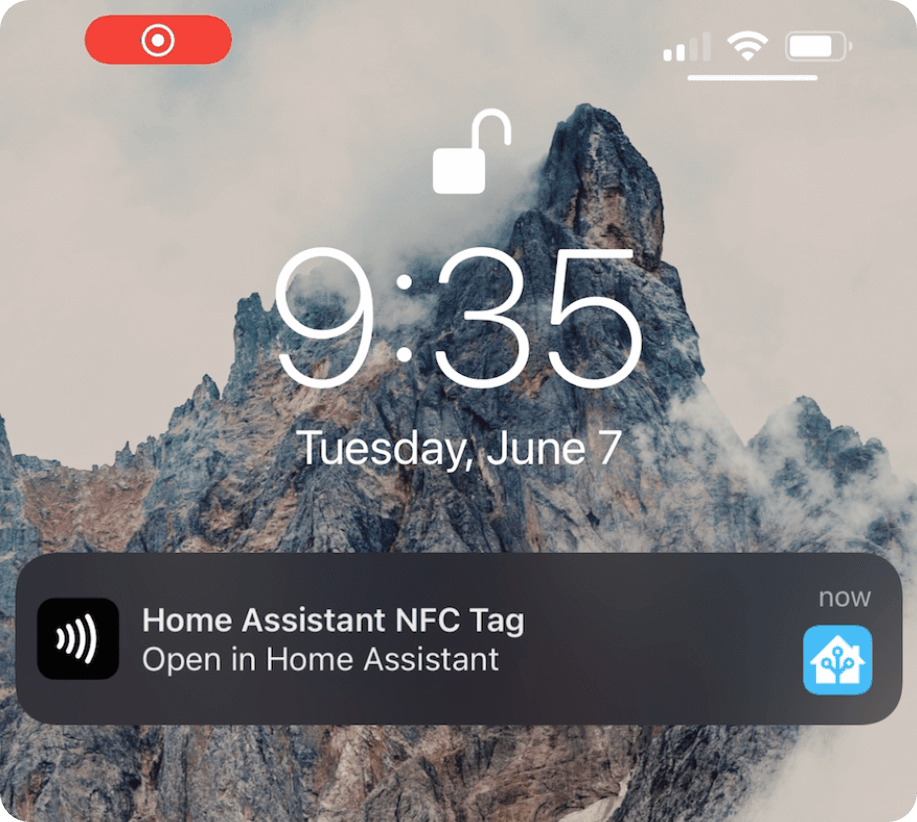
This method is not the best, and it’s not an issue with Home Assistant. It is a security measure put in place in iOS to prevent unwanted tasks from running without you first tapping the notification. I’m not sure if it’s the same on Android, but it is that way on iOS.
Use the Shortcuts app in iOS to trigger automations in Home Assistant
Instead of adding NFC tags in Home Assistant, you can create an automation using the Shortcuts app on iOS. The automation would run an event in Home Assistant when the NFC Tag is scanned.
Open the Shortcuts app on an iPhone, go to Automations and tap the plus icon on the top right. Select Create Personal Automation. Search for NFC and tap on it. Under NFC tag, tap on Scan and then scan the NFC Tag. Give it a name and tap on OK. After that, click Next on the top right.
Then, click on Add Action, search for Home Assistant Fire Event, and select it. Where it says, shortcut_event, change it to whatever name you would like for the event. For the automation we set up above, we can name it, for example, toggle_monitor_lights. Make sure that the event name that you set up has no spaces.
Another action that I would suggest adding is to get some feedback when the automation is triggered. On the search bar below, search for Vibrate Device and select it. So, when the automation runs, your phone will vibrate, letting you know that the NFC Tag was scanned and the automation ran.
Tap Next and uncheck the option, Ask before running, and on the pop-up, tap Don’t ask. The option Notify When Run will also be unchecked, so you don’t get a notification every time the automation is triggered. Tap on Done, and next, we need to change the trigger in the Home Assistant automation to use the event sent from the Shortcuts app.
In the automation editor, change the Trigger type to Event. Then, for the Event type, enter the name you set up in the Shortcuts automation. Save the changes, and if you bring your phone over the NFC Tag, it will run the automation in the background without tapping on a notification.
Cons of using the Shortcuts app on iOS
One bad thing about using this method is that it would only work on the device that has the automation in the shortcuts app. If you have other users in your home, the automation in the shortcuts app will need to be set up on each individual device. However, to avoid tapping on a notification to run the automation every time, it’s definitely better to use this method.
What automations can we set up with NFC Tags?
You can use NFC Tags with many different automations. Pretty much anything that can be triggered with a button can also be triggered with an NFC Tag. Like, we set up before, we can use NFC Tags to toggle lights. Another idea is, for example, to use them to control an alarm system linked to Home Assistant. You could have the NFC Tag by your front door and quickly arm or disarm your alarm. Another idea is that if you have a smart lock, you could install an NFC Tag outside your door to lock and unlock your door. The list pretty much goes on.
Support
As a solo creator, I dedicate my free time to maintaining this site. If you find my content useful, consider supporting the blog—every contribution helps keep the content coming.
Buy me a coffee